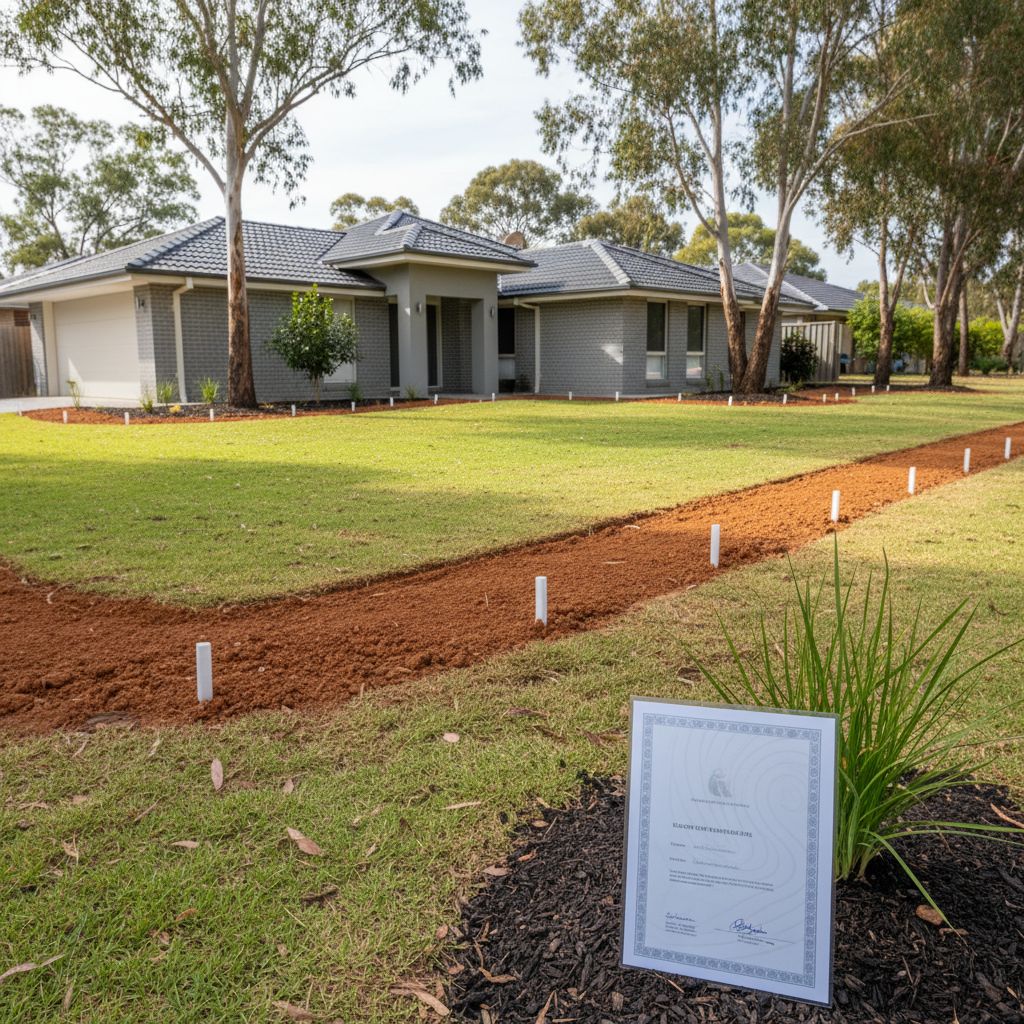
Design the garden and inspection route together
A garden can be attractive and still make a house difficult to inspect. Dense planting, raised beds, stored timber, new paving and enclosed corners can change how a termite professional reaches or sees the building edge. When planning a Gold Coast garden update, include inspection access in the design brief alongside shade, privacy and outdoor use. The aim is to give the relevant professional a clear view of the proposed interfaces before they become permanent features.
Start by recording the current arrangement from normal, safe walking areas. Show the relationship between the house, paths, beds, decks, fences and sheds. Include the side of the home used mainly for bins or storage, because that space can disappear from a garden design focused on the entertaining area. Mark places you cannot see or reach safely. Those gaps are questions for the inspector and designer, not instructions to squeeze behind equipment or enter a concealed space.
Queensland's QBCC termite guidance identifies landscaping, garden beds, paths and turf as changes that can affect a termite-management system. That is a reason to review the details of your project, not a reason to assume every planted bed has caused damage. The practical response depends on the construction, existing protection and final layout. Ask for property-specific advice rather than adopting a clearance or material rule from a generic diagram.
Map the building edge before choosing finishes
Divide the perimeter into recognisable sections: front entry, driveway side, laundry wall, rear patio and garden side, for example. For each section, note what is visible, what is blocked and what the proposed work would change. A few labelled photographs can support the map. Keep the descriptions neutral. Write soil against wall or shrubs obscure lower wall rather than labelling the area a termite entry point without an assessment.
Add known management-system features from the available records. These might include documented inspection areas, service access points or station locations. Have a professional interpret unfamiliar components rather than guessing from shape or colour. A cap in the ground may belong to another service. Do not open it, move it or apply any product through it. If plans and visible features do not agree, put that discrepancy on the review list before excavation or paving begins.
Compare the current and proposed arrangements side by side. A path that improves access on one elevation may be accompanied by a raised bed that obscures another. A bin enclosure may solve storage while blocking the route needed for inspection. The designer can consider alternatives once the competing uses are visible. This is more productive than asking for a general declaration that the garden is termite-safe without explaining where the building will be accessible.
Plan planting for its maintained size
Discuss the mature and maintained size of plants with the landscaper. A small nursery plant may eventually fill the space intended for a person to walk or view the lower wall. Ask how the bed will be maintained and whether trimming can be done from an ordinary standing position without damaging the building or interfering with services. The maintenance plan should match the owner's realistic ability to keep the arrangement usable.
Think about the depth of the planting arrangement as well as its height. Layered shrubs can create a dense screen between a path and the house even when the path itself remains clear. Ask the inspector which parts of the building need visibility, then let the garden designer develop a planting solution around those requirements. This avoids treating the inspection route as leftover space after every decorative feature has already been positioned.
Privacy can sometimes be provided in a different location from the building edge. Discuss whether screening, seating or pots could be arranged without concealing an important interface. Do not move large pots or heavy planters yourself to test a new layout. Mark the proposed position on a plan and obtain suitable assistance if relocation is agreed. If a plant or root is affecting structure or services, involve the relevant professional rather than cutting or excavating experimentally.
Keep irrigation and drainage questions visible
Include irrigation layout in the garden review. Identify where water is intended to go and which building surfaces or areas may be repeatedly wetted. From a safe location, record obvious overspray or persistent dampness and pass the observation to the appropriate contractor. Do not assume the cause is a leaking pipe simply because a patch remains wet. Drainage, irrigation and building moisture require their own assessment, alongside any termite concerns.
Ask how the completed garden will drain and whether proposed levels affect the house or neighbouring features. This belongs with the designer and appropriate trades; it is not a recommendation to dig channels beside foundations or alter a drainage connection. A termite inspection may identify a condition needing further attention, but the design of a drainage solution is a separate task. Keep the two scopes linked by location while retaining the distinction between them.
Where a garden change follows a previous moisture problem, keep the repair history available. Explain which contractor attended, what work was recorded and whether anyone reviewed the outcome. A newly dry surface does not automatically resolve every question raised in an earlier report. Ask what information the termite inspector needs to assess the changed conditions and whether the previous limitation or recommendation remains relevant to the new layout.
Treat timber storage as an ongoing use
Firewood, leftover renovation timber and garden materials are often stored where there is spare space rather than where access was designed. Include these ordinary uses in the plan. Show where material will arrive, how it will be used and whether the storage position blocks the building edge, a gate or a documented service point. A layout that works only when the household has no stored items is unlikely to remain useful throughout the year.
Ask the termite professional to review proposed timber-storage arrangements in relation to the house and management system. Avoid turning a general recommendation into a claim that a particular stack is infested or that moving it establishes protection. If you notice suspected activity in stored material, stop handling it and seek advice about the observation. Do not spray it, break it apart or carry suspect pieces through the house for identification.
Include discarded offcuts and temporary construction storage in the contractor's scope. Decide who removes leftover material when the work ends and who checks that agreed access areas remain clear. A builder, landscaper and homeowner may each assume someone else owns the last pile. Recording the responsibility makes it easier to restore the intended inspection route without treating site tidiness as evidence about the condition of the building itself.
Review paths, decks and retaining features as interfaces
Hard landscaping can affect more than walking convenience. Before adding paving, a deck skirt, retaining feature or permanent enclosure, ask how it meets the house and whether it conceals an area relevant to inspection or an existing management system. Provide drawings or labelled photographs to the professional reviewing the interface. The important details may be below the finished surface or behind a connection that is not obvious in a product photograph.
Do not excavate beside a footing, alter a retaining structure or remove a fixed deck component to investigate on your own. Ask the relevant contractor what assessment is needed and how safe access will be provided. If a proposed change requires an opening or removable section, have that detail designed for its intended use. A panel should be identifiable and practically accessible after furniture, planting and storage are in place.
For staged projects, keep the later work visible to the first contractor. A path installed now may be followed by a bed or deck extension that changes the same interface. Tell the termite professional about the whole intended sequence, even if only part is currently funded or designed. Our renovation interface guide explains how to coordinate review points when multiple trades will alter the same part of the property.
Example: redesigning a narrow side passage
Consider an illustrative side passage containing bins, a hose reel, shrubs and a proposed new path. The owner wants less mud and a tidier view from the kitchen. Before selecting pavers, they record the lower wall, visible service components and the area hidden by shrubs from safe viewpoints. They give those photographs and the proposed path layout to the landscaper and termite inspector, identifying where the passage is already difficult to use.
The discussion considers where the bins will stand, how the garden will be maintained and which parts of the wall need to remain visible. If the planned path would affect an existing treatment area, the relevant professional determines what review or work is needed. The owner does not assume that replacing vegetation with a hard surface solves every issue, nor that every plant must be removed. The design is assessed as a combination of materials, levels and access.
When the work is complete, the owner keeps a small set of photographs and the relevant contractor documentation. They compare the finished arrangement with the access plan and note any differences for review. This example is about the planning process, not a construction detail or a claim about a real project. A different house, system or site slope may require a different approach even where the garden looks similar.
Maintain the access that the design provides
After the project, give anyone maintaining the garden a short plan showing access areas and specialist components that should not be disturbed. Include the contact to use if a feature becomes damaged, buried or difficult to reach. A replacement gardener should not have to guess why a clear area was left beside the building or what an unfamiliar station is for. Keep this information with the property's maintenance records so it survives a change of contractor.
Revisit the layout when ordinary use changes. A new storage cabinet, growing hedge or additional mulch may affect an area that was clear at handover. Record the change and discuss it at the next appropriate professional review, or sooner if a new concern is observed. The inspection preparation guide helps explain current access conditions, and the routine inspection service provides an existing enquiry route for assessment.
Measure the success of the garden brief by whether its intended inspection and maintenance arrangements remain usable. Do not describe the result as termite-proof or treat a completed checklist as a health certificate for the house. The useful outcome is a documented layout, an understandable maintenance plan and a clear route for professional advice when the building edge or its management system is affected by future changes.
Garden interface planner
Mark each topic when you have a note or question for the landscaper and termite professional.